Connect to your Nuxt dApp with Ethereum using Metamask and Web3.js
Create or turn a Nuxt.js app into a web 3.0 dApp by allowing connections with an Ethereum address


Hi and welcome! Are you starting a brand new dApp with Nuxt.js, or want your pre-existing Nuxt app to allow users to connect with their Ethereum address? Then this tutorial is for you!
We'll learn how to get a user's Ethereum address, balance and all the other node data you'd need to make your dApp work. For this, we will make a simple Nuxt front-end that gets information from the browser wallet Metamask thanks to the Web.js library and saves it in a Vuex store. From that basis, you will be able to make the complex, awesome dApps of your dreams!
Prerequisites:
- Install Metamask and set-up your wallet. You can learn how here.
- Create a Nuxt project
For this tutorial I will be using TailwindCSS as a UI framework. I am using Node v14.15 and Nuxt v2.15.
"Connect with Metamask" button
Once you have generated your Nuxt app, you'll want to create a component that enables the user to connect with Metamask. Go to the components folder (created by default) and create a Metamask.vue file (note the capital first letter). It will be a button that, when clicked, activates the connection.
NOTE: We don't want the code for the connection to be inside that component. Indeed, we always want our code to be as high in the hierarchy as possible. This means that we should always put our code in a page instead of a component if we can. The component simply emits a event that the page listens to. When the event is emitted by the component, it triggers the method in the page.
(/components/Metamask.vue)
<template>
    <div
        @click="$emit('connect')"
        class="flex flex-row w-1/4 justify-center items-center p-3 border-2 text-blue-600 border-blue-600 font-bold hover:text-white hover:bg-blue-600">
        <img
            src="https://upload.wikimedia.org/wikipedia/commons/3/36/MetaMask_Fox.svg" alt="Metamask"
            class="h-5 mr-2">
        Connect to Metamask
    </div>
</template>
Hurray, a button!
Connect using Web3.js
Now we're getting to the core of this tutorial. Web3.js is a Node.js library that allows you to read and interact with Ethereum nodes. You can download it with this npm command:
npm install web3
Before I show you the big connection code and you mindlessly copy-paste it, please try to understand how it works. Here's the pseudocode (source):
START dapp
IF provider is defined
    REQUEST[1] account access
    IF user approves
        RESOLVE[2] account access
        CONTINUE dapp
    IF user rejects
        REJECT[3] account access
        STOP dapp
IF provider is undefined
    STOP dapp
Translated into English:
- Check if your browser detects a Ethereum provider. In that case, it's the Metamask browser wallet. It is accessible through window.ethereum. If the provider exists, then we can ask for access.
- Check user approval. Metamask will pop-up and ask if you want to connect to the website. You can accept or decline.
Now that you understand it, let's see the actual code. For the following code, I give huge thanks to Alec M. Wantoch and Nico Vergauwen for giving me the necessary knowledge!
EDIT: Big thanks to Lars K. L. as well for adding the await window.ethereum.send('eth_requestAccounts'); line. Without it, the connection didn't work for some people.
(/pages/index.vue or /layouts/default.vue):
async initWeb3 () {
      // Check for web3 provider
      if (typeof window.ethereum !== 'undefined') {
        try {
          // Ask to connect
          await window.ethereum.send('eth_requestAccounts');
          const instance = new Web3(window.ethereum)
          // Get necessary info on your node
          const networkId = await instance.eth.net.getId();
          const coinbase = await instance.eth.getCoinbase();
          const balance = await instance.eth.getBalance(coinbase)
          // Save it to store
          this.registerWeb3Instance({
            networkId,
            coinbase,
            balance
          })
        } catch (error) {
          // User denied account access
          console.error('User denied web3 access', error);
          return;
        }
      }
      // No web3 provider
      else {
        console.error('No web3 provider detected');
        return;
      }
    }
Here we are saving three attributes from our node:
- Network ID: Basically determines whether our node is on the mainnet or not. If it is 1, it is on the mainnet and you are using a real Ethereum address. It wouldn't be 1 if you are using a testnet like Ganache.
- Coinbase: Address of your node on the network.
- Balance: How much ETH your address contain. The value is not given in ethers but in weis (the smallest ether sub-unit). One wei = 0.000000000000000001 ethers, so don't be surprised if you balance is a very large number. You're not really that rich...
Save in Vuex store
Since we'll most likely be accessing our Ethereum connection info from everywhere in our app, it's important to save it in a Vuex store. As Nuxt does all the indexing for us, we only have to create a web3.js file in the store folder.
(/store/web3.js):
const web3 = {
    namespaced: true,
    state: () => ({
        web3: {
            networkId: null,
            coinbase: null,
            balance: null,
        },
    }),
    getters: {
        getInstance: (state) => {
            return state.web3
        },
    },
    mutations: {
        registerWeb3Instance (state, payload) {
            console.log('registerWeb3instance Mutation being executed', payload)
            let result = payload
            let web3Copy = state.web3
            web3Copy.coinbase = result.coinbase
            web3Copy.networkId = result.networkId
            web3Copy.balance = parseInt(result.balance, 10)
            state.web3 = web3Copy
        },
    },
    actions: {
    }
  }

  export default web3
Note that we're not directly affecting state.web3, or we would get a horrendous "Stack size exceeded" error.
Display node data
Remember our Metamask.vue component? Well, now is the time to put it in our page. When the "connect" even is triggered, we execute the initWeb3.js method, saving our node data to the Vuex store. We will also display the node data on the page, to show the connection worked.
(/pages/index.vue or /layouts/default.vue):
<template>
  <div class="p-4">
    <Metamask @connect="initWeb3" />
    <div>
      <p>Network: {{ web3.networkId }}</p>
      <p>Account: {{ web3.coinbase }}</p>
      <p>Balance: {{ web3.balance }}</p>
    </div>
    <p class="italic text-red-600">{{ errorMessage }}</p>
  </div>
</template>

<script>
import Web3 from 'web3'

import { mapGetters, mapMutations } from 'vuex';

export default {
  name: 'Index',
  data () {
    return {
      errorMessage: ''
    }
  },
  computed: {
    ...mapGetters('web3', ['getInstance']),
    web3 () {
      return this.getInstance
    }
  },
  methods: {
    ...mapMutations('web3', ['registerWeb3Instance']),
    async initWeb3 () {
      // Check for web3 provider
      if (typeof window.ethereum !== 'undefined') {
        try {
          // Ask to connect
          await window.ethereum.send('eth_requestAccounts');
          const instance = new Web3(window.ethereum)
          // Get necessary info on your node
          const networkId = await instance.eth.net.getId();
          const coinbase = await instance.eth.getCoinbase();
          const balance = await instance.eth.getBalance(coinbase);
          // Save it to store
          this.registerWeb3Instance({
            networkId,
            coinbase,
            balance
          });
          this.errorMessage = '';
        } catch (error) {
          // User denied account access
          console.error('User denied web3 access', error);
          this.errorMessage = 'Please connect to your Ethereum address on Metamask before connecting to this website';
          return;
        }
      }
      // No web3 provider
      else {
        console.error('No web3 provider detected');
        this.errorMessage = "No web3 provider detected. Did you install the Metamask extension on this browser?";
        return;
      }
    }
  }
}
</script>
Now, you can try it yourself!
If you click on the connect button without having the Metamask extension or without being connected to any address, you'll see an error message.
If you connect to your address on Metamask, you'll see that address and its balance being displayed. It should look something like this:
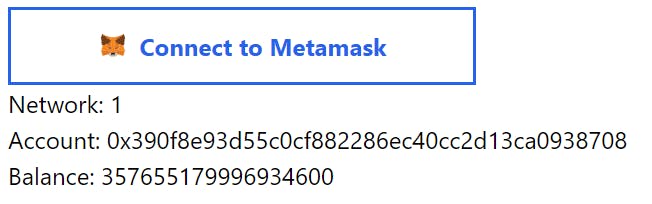
Congratulations! Now you're all set to develop your dream web 3.0 dApp!
Find all the code in this GitHub repo.
If you found this tutorial helpful or even life-saving, feel free to leave me a little tip:
ETH - benjaminazoulay.eth
BTC - bc1q2sf9deqxcyveslk6efrrxga7ch3n7wr97klfs6
BCH - bitcoincash:qqqm7g4cewyrk2gexklqshjactr3w6mkm5c6v6qtjr